If the corporate or the personal devices used for work got lost or stolen, you could not risk a corporate data leak. Locking the device is a solution, but what if they cracked the device password. So, completely wiping the device might be the only option to protect such sensitive data.
You can either perform a corporate or a complete wipe. Corporate wipe is usually recommended if you are wiping a BYO Device. This ensures that the personal data in the device will be left untouched. Use complete wipe to wipe a corporate-owned device.
Note:
Wipe Device action can be performed on:
- Android devices
- Windows devices
- iOS devices running iOS 4.0 and above
- macOS devices running macOS 10.7 and above
- tvOS devices running tvOS 10.2 and above
The device management of a wiped device can only be retained in some types of Android and iOS device enrollments.
Warnings:
1. The wipe action cannot be stopped halfway. Once initiated, the process stops only after the device is wiped completely.
2. If a device is wiped, all corporate, as well as the personal data including files, contacts, calendars, apps, certificates, and settings, will be deleted.
3. Hexnode UEM no longer manages a standard/rooted Android, unsupervised iPhone/iPad, Windows or Mac once it is wiped. Such devices need to be re-enrolled manually. The device details in Hexnode MDM portal will stay as it is.
- Android devices enrolled via Samsung Knox, Zero-touch, Android ROM/OEM enrollment, devices with Hexnode MDM as a system app and devices with Hexnode System Agent app as a privileged app will re-enroll in Hexnode UEM automatically once the device is turned on and connected to the internet after wiping.
- For supervised iOS,
- If the device is enrolled via Apple Configurator, it won’t be connected with Hexnode after a complete wipe, they have to be enrolled again.
- If the device is enrolled via DEP, it will be re-enrolled to Hexnode even after a complete wipe.
- If the iOS devices are added to DEP via Apple Configurator, users can opt-out of MDM management by wiping the device to its factory settings during the 30-day provisional period. On activating the device after the wipe, the user will be asked to activate remote management, click on Leave Remote Management on the bottom of the screen to disable MDM administration. However, after the initial 30 days of the device deployment, this option will get disabled on the device.
To wipe a device completely,
- Login to your Hexnode portal.
- Navigate to Manage tab.
- Click on the device you wish to wipe or select the devices.
- From Actions drop-down, select Wipe Device.
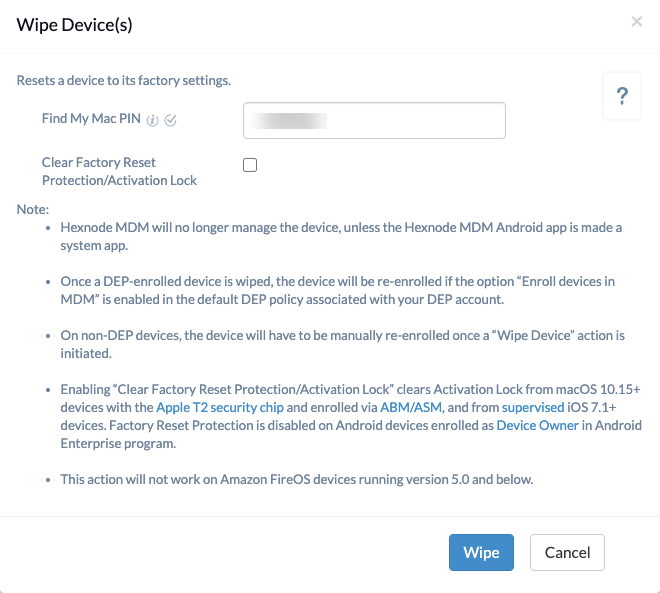
- If you are remotely wiping a device running macOS 10.8 or above, enter your Find My Mac PIN.
- If required, enable Clear Factory Reset Protection/Activation Lock.
- Click Wipe, in the confirmation dialog.
- Enter the password of your Hexnode MDM portal and click Confirm to initiate device wipe.
Warning:
This action will not work on devices running Fire OS v5.0 or below.
Note:
Enabling “Clear Factory Reset Protection/ Activation Lock” clears Activation Lock on supervised iOS devices and Factory Reset Protection on Android devices enrolled as Device Owner in the Android Enterprise program while performing device wipe.
To wipe a single device
To wipe multiple devices
Automatic device wipe using Hexnode UEM
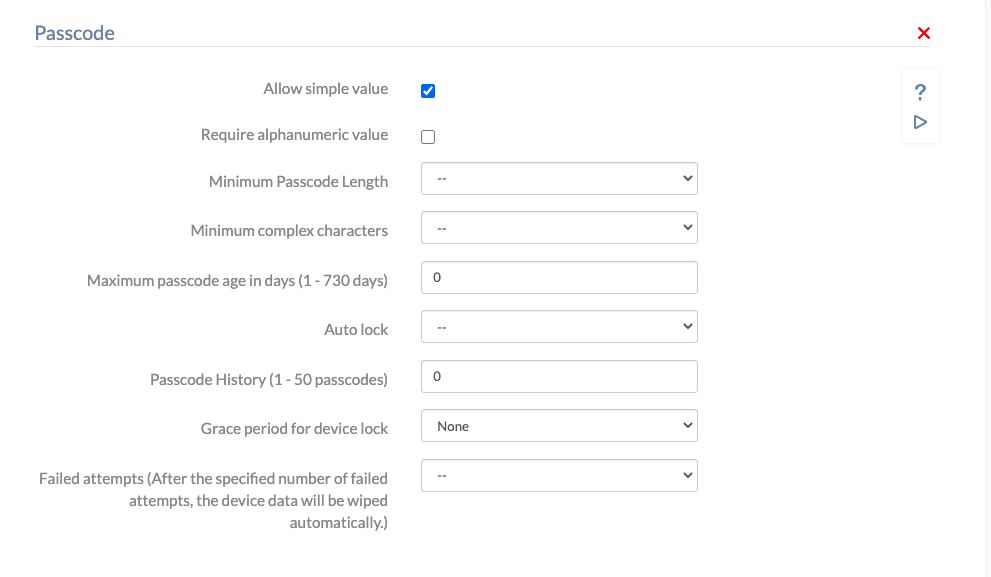
A device can be set up to get completely wiped automatically if the user enters an incorrect password for a specific number of times. This feature is available only on iOS, Android and Windows devices. To set up,
- Go to Policies and create a new policy or continue with an existing one.
- Go to iOS > Passcode/ Android > Device Password/ Android > Work Profile Password/ Windows > Password.
- Set a value for Failed Attempts/Failed attempts before wipe.
To associate this policy with targets before saving,
- Go to Policy Targets tab from the policy set up screen.
- Add devices, users, device groups, user groups or domains.
- Now, save the policy.
To associate the policy after saving the policy,
- Go to Policies and select the required policy.
- Click on Manage > Associate Targets.
- Click on Device/User/Device Group/User Group/Domain.
- Select the required targets and click on Associate.
