Category filter
How to set up Web Content Filtering on Android Devices?
Corporate deployed endpoints often house confidential and sensitive documents. These critical data have to be kept secure at all times. Since the data remains in the employee devices that are not heavily guarded, it is highly vulnerable to attacks or breaches. These attacks mainly occur when the employees click on an unsecured or unwanted website. These issues can be quickly resolved by blocking employees’ access to unsecure websites through web content filtering. Nevertheless, blocking access to specific websites helps the organization save network bandwidth.
Configure Web Content Filtering on Android
To configure web filters,
- Login to your Hexnode portal.
- Head on to Policies.
- Select an existing policy from the list or add a new one.
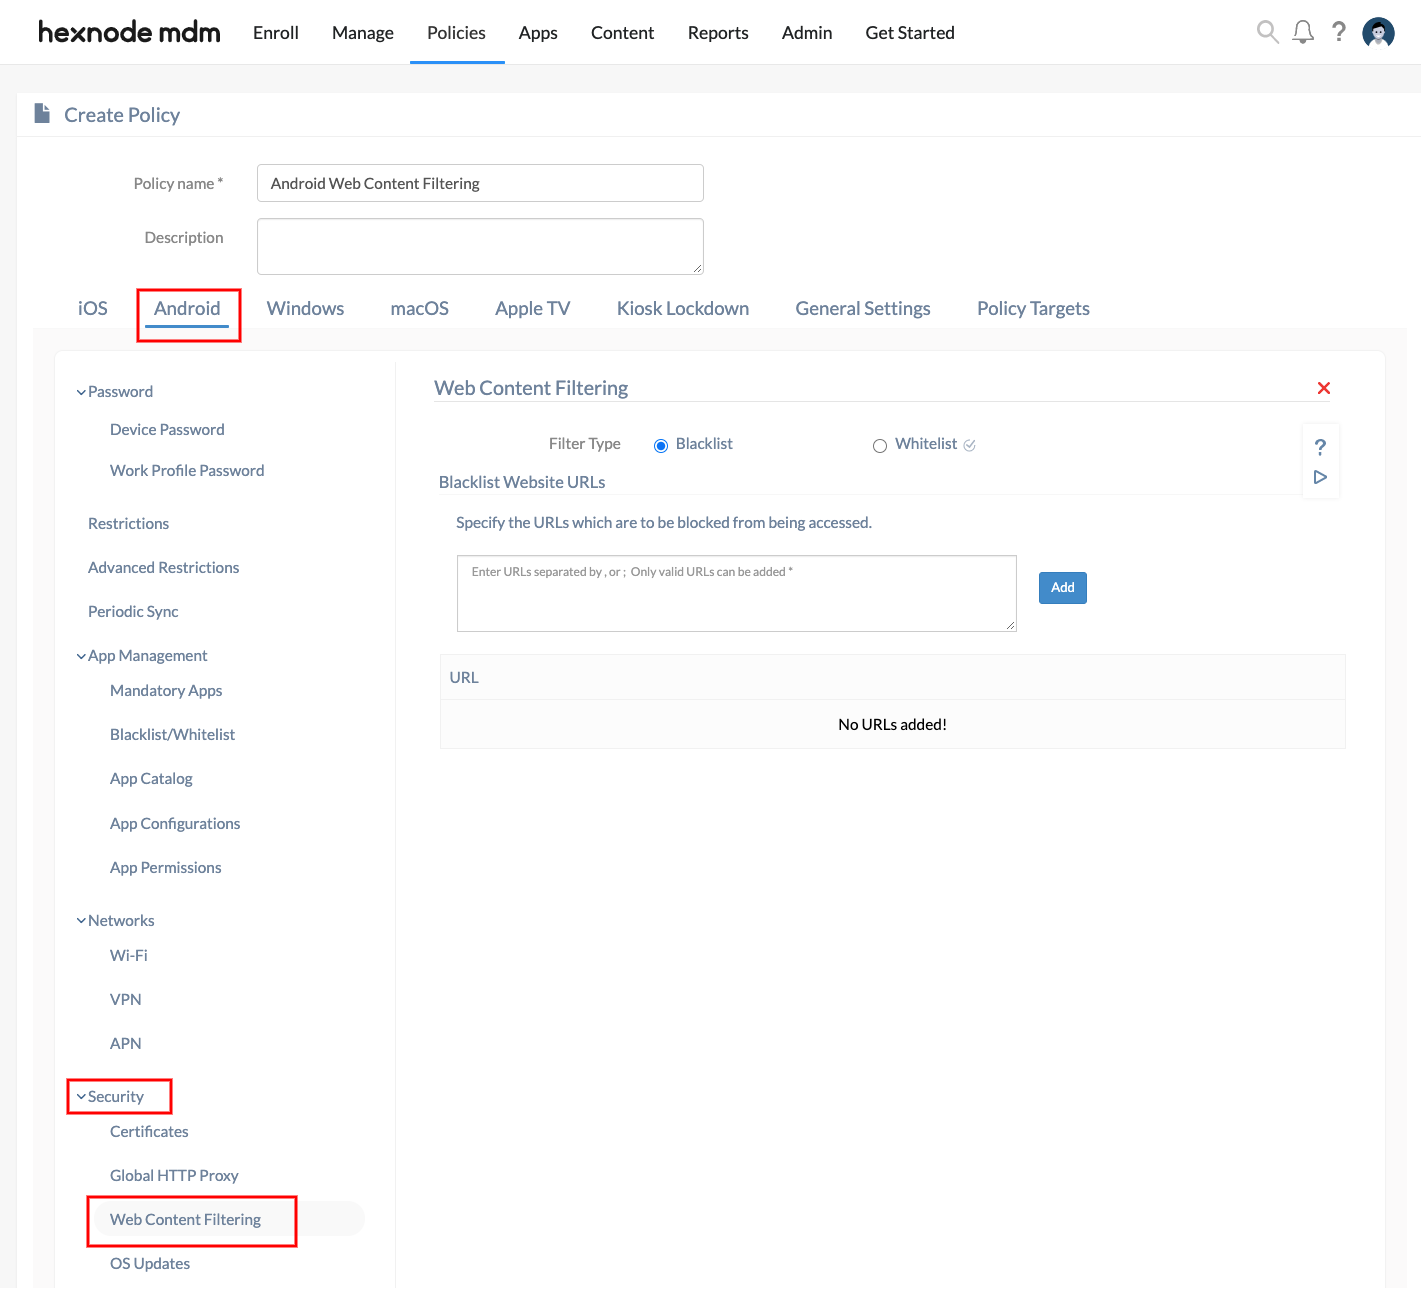
- Go to Android > Security > Web Content Filtering.
Blacklisting URLs
If you have a single URL or a particular set of URLs that you might want to keep away from the end user’s reach, then blacklisting them will be the better option. Even if you blacklist a specific page of a website (such as https://www.hexnode.com/mobile-device-management/), the whole domain (https://www.hexnode.com/) will be blacklisted.
Before adding URLs, make sure
- URLs start with either http:// or https://.
- Separate the URLs using commas or semi-colons.
To blacklist URLs,
- Login to your Hexnode portal.
- Go to Policies.
- Select an existing policy from the list or add a new one.
- Go to Android > Security > Web Content Filtering. Click Configure.
- Set the filter type as “Blacklist”.
- In the text box provided below, enter a URL that is to be blacklisted, followed by pressing the ‘check’ button to the right.
All the added URLs will be displayed on the Web Content Filtering policy page. Click the X button if you wish to remove any URL from the list.
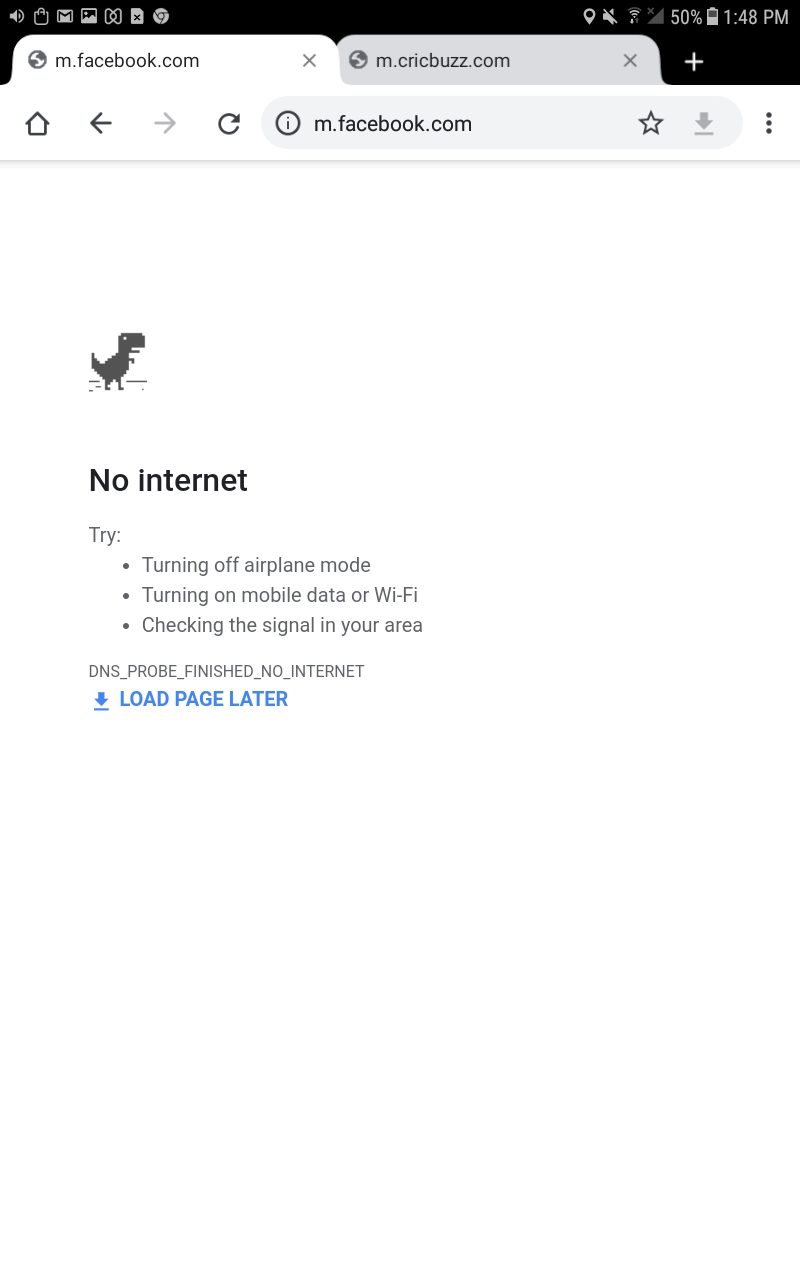
On the device end, the blacklisted websites cannot be opened. The user will be greeted with the page showing “No internet”. Sites that are not whitelisted will also be considered as blacklisted.
Whitelisting URLs
You can whitelist a URL to block access to all other URLs from the device. Note that you cannot add a complete URL including its subfolders (something like https://www.hexnode.com/mobile-device-management) to be inserted into the field. Even if you insert the complete URL, the entire domain (https://www.hexnode.com/ in the case of the above example) will be whitelisted.
The same rules of blacklisting URLs apply here.
- Prefix http:// or https:// to a URL.
- Whitelist single or multiple URLs. Separate the URLs using commas or semi-colons.
To whitelist a URL,
- Login to your Hexnode portal.
- Go to Policies.
- Select an existing policy from the list or add a new one.
- Select Web Content Filtering from Android > Security.
- Click on the radio button corresponding to the “Whitelist” option to set it as the filter type.
- By default, contents in the Google Play Store app cannot be accessed from the devices when whitelisting is enabled. But you can allow access to the Play Store app by selecting the option Allow Google Play Store.
- On the box provided below, enter the URLs one by one, which needs to be whitelisted.
On the device end, the user will only be able to open websites that are whitelisted, thus preventing them from accessing any unwanted sites.
Associate Policies with Target entities
If the policy has not yet been saved.
- Navigate to Policy Targets.
- Select the Devices, Users, Device Groups, User Groups and Domains to which the policy has to be attached.
- Click on Save to apply the policies to the target entities.
If the policy has been saved, you can associate it with another method.
- From the “Policies” tab, select the policy to be associated.
- Click on Manage > Associate Targets and select the target entities. This can be devices, users, groups or domains.
- Click on Associate.
