Category filter
Configuring Custom Technician Roles
You can have your Hexnode MDM portal managed by multiple admins. The user who signs up for the portal is the Super Admin. You can then add multiple technicians. Each new technician can be assigned any of these roles – Admin, Reports Manager, or Apps and Reports Manager.
- Admin: Admins have full privileges, and access to all the features in the portal.
- Reports Manager: Reports managers can access only the dashboard, Reports tab and the features in there.
- Apps and Reports Manager: Apps and Reports managers have access to the features in both the Apps and Reports tabs. They can also view the dashboard.
Create technicians in Hexnode UEM
To create a technician,
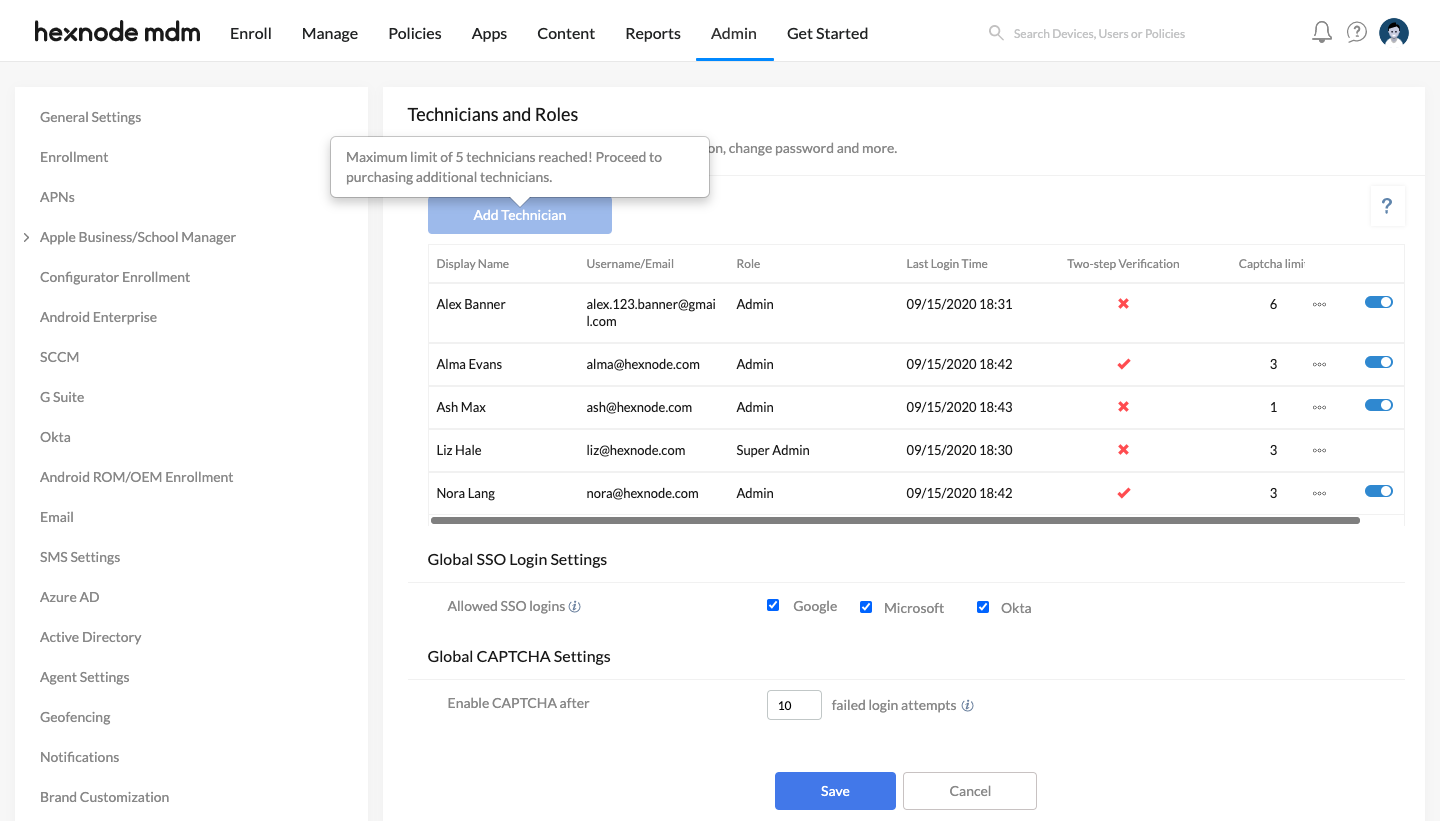
- On your Hexnode MDM console, navigate to Admin > Technicians and Roles.
- Click on Add Technician.
- Enter the first and last name of the technician.
- Enter the Username/Email of the technician. If you are enabling SSO (Single Sign On) for the technician, the username should match the email address of the user.
- Enter the Phone number of the technician.
- Specify the name of the organization where the technician belongs.
- Choose a specific technician role: Admin, Reports Manager, or Apps and Reports Manager.
- If required, enable SSO login via Google, Microsoft, or Okta for the technician. Technician sign in with local credentials is enabled by default.
- Verify with CAPTCHA after ___ failed login attempts: Choose the maximum failed login attempts for a technician, after which CAPTCHA will be enabled. It can take values between 1 and 10. By default, the set value is three.
- Mandate Two Factor Authentication: Enabling this option would initiate log in via a two-step verification process. The first step involves the technician signing in with local or directory password. The second step is to enter a verification code sent to the technician or provided by third-party authenticator apps. This option is enabled by default.
- Send Verification Code via: Select Email or Text message as the method via which the technician will receive the verification code for sign in.
- Ask this user to set up Third Party Authenticator: If enabled, the technician can only sign in to their portal by verifying the time-based code shown in the Microsoft Authenticator or Google Authenticator app. You can even login via the recovery codes if you do not have access to the device on which the third-party app is set up. Recovery codes are obtained while setting up the third-party authenticator app. Note that a recovery code can only be used once to log in.
- Require code: Choose the time period after which the two-factor authentication will be mandated for technician sign in. The available options are Every time logging in, Every 7 days, and Every 30 days.
- Logout after a period of inactivity: If enabled, the technician will get logged out after the specified period of inactivity.
- Logout after: Set the time for the period of inactivity, after which the technicians will get logged out automatically.
The available options are:- 30 min
- 45 min
- 60 min
- 90 min
- 2 hours
- 4 hours
- 8 hours
- Click Save.
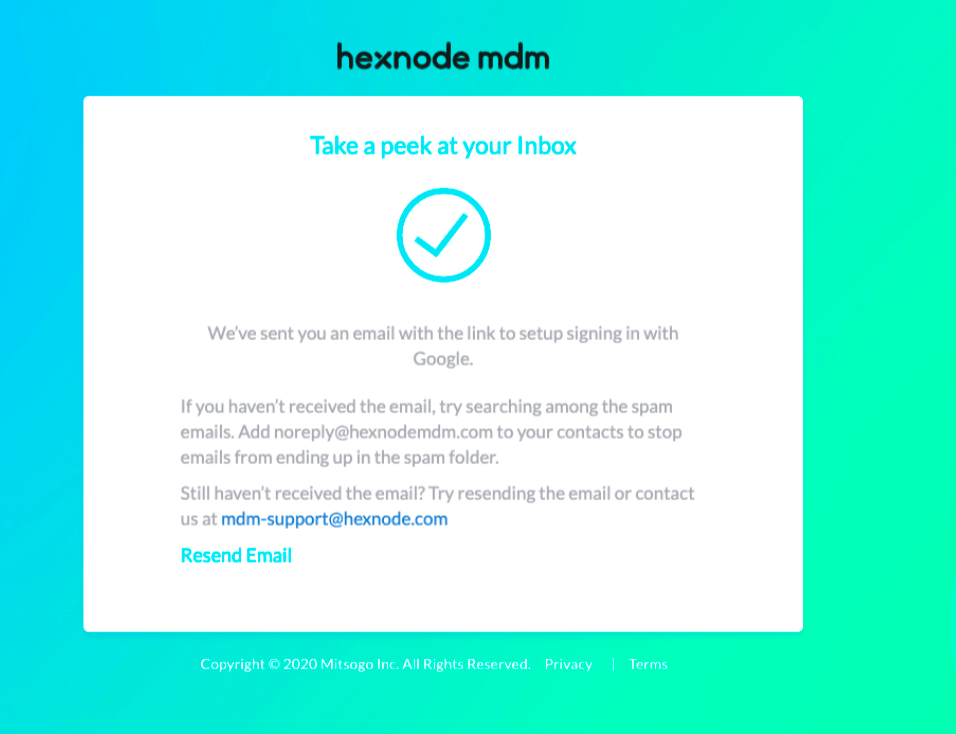
This will send an email invitation link to the technician. The link will automatically expire in a day or if it is used. The technicians can activate the account by clicking on the Setup account in the email invitation. They will then be asked to set up signing in with Google, Microsoft, or Okta or to set a local password.
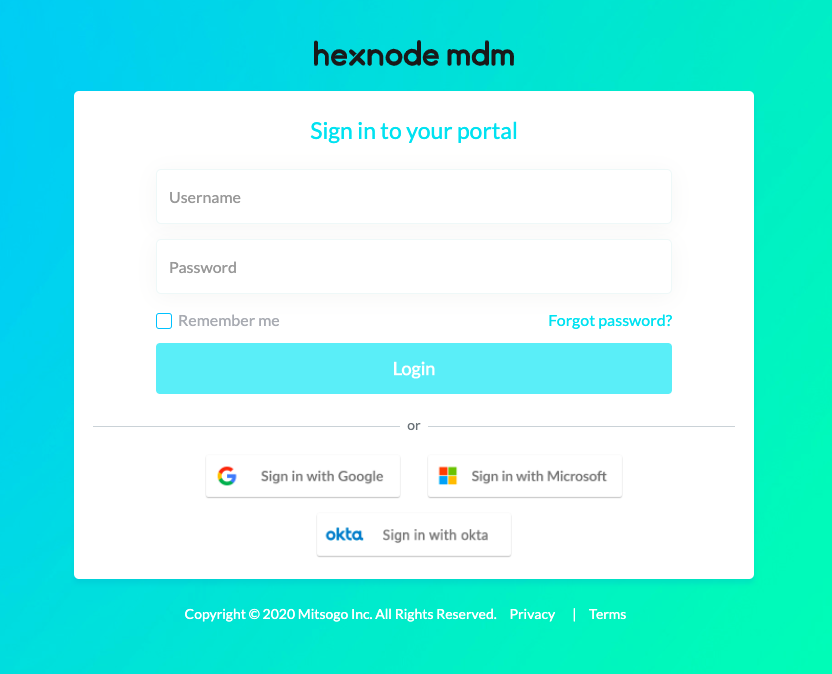
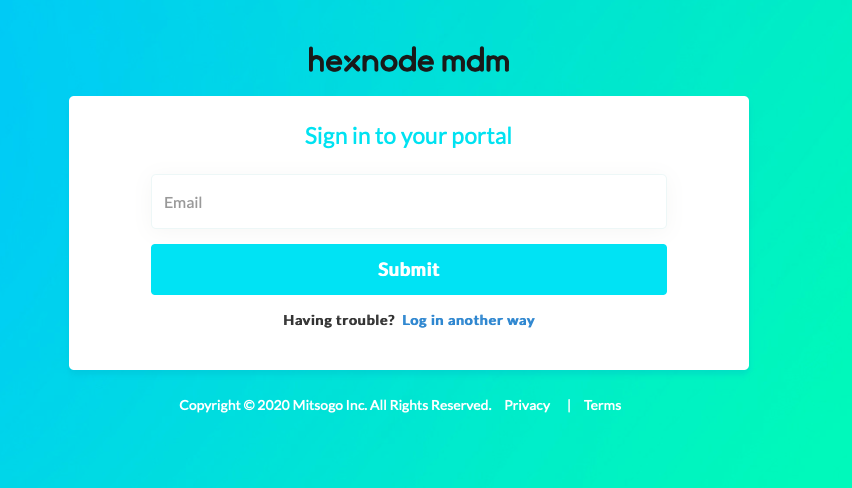
On enabling SSO login for technicians with Microsoft, Google and Okta authentication, the Hexnode UEM sign-in page will look like this.
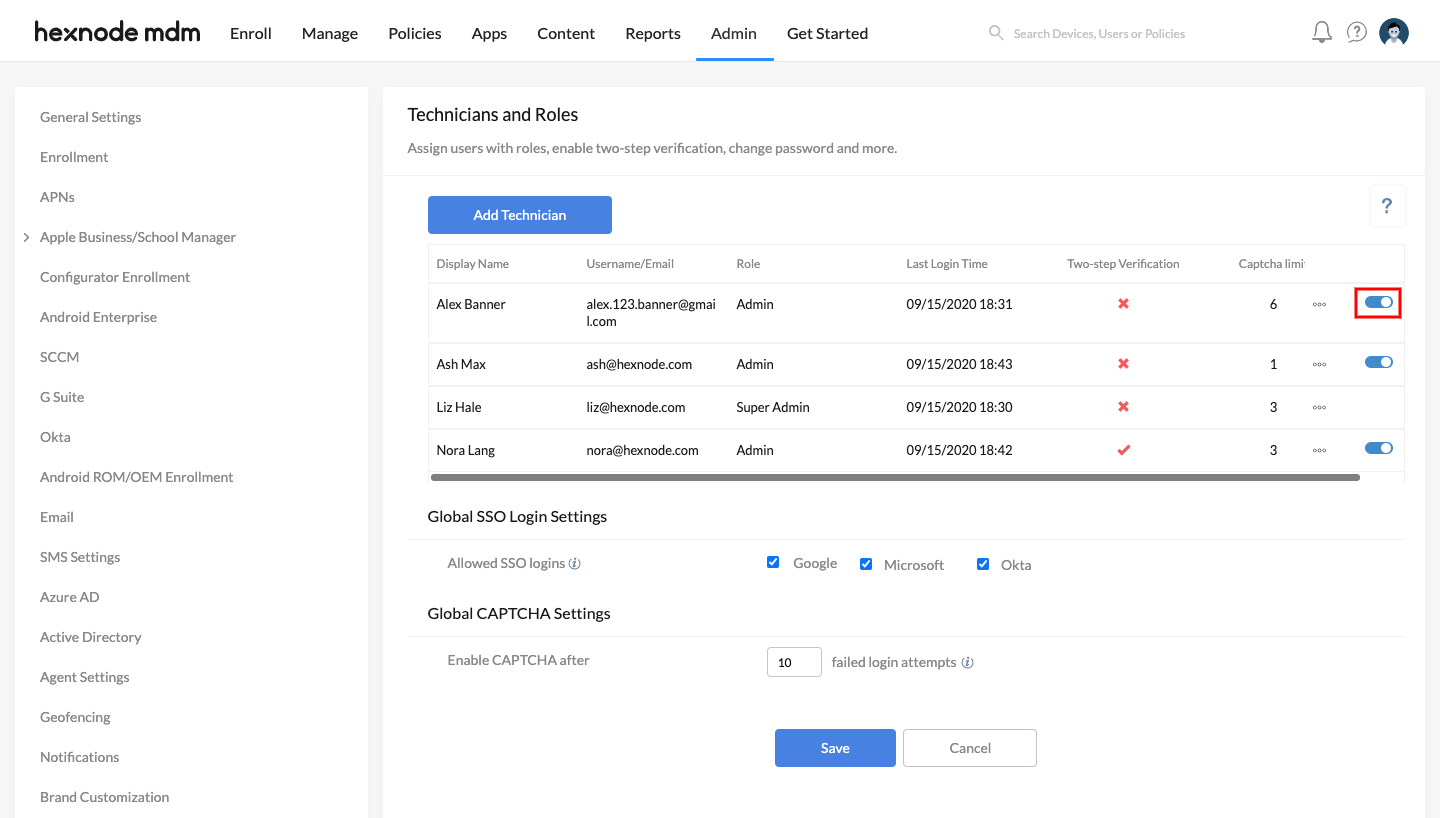
Global SSO Login Settings
SSO login settings can be applied globally to all the technicians using the Global SSO Login Settings.
- On your Hexnode MDM portal, head on to Admin > Technicians and Roles.
- Enable Google, Microsoft, or Okta and as the Allowed SSO logins under Global SSO Login Settings. Technician sign in with local credentials is allowed by default.
- Click on Save.
Global CAPTCHA Settings
Global CAPTCHA settings can be applied globally to all the technicians within the portal.
- Login to Hexnode portal.
- Navigate to Admin > Technicians and Roles.
- Under Global CAPTCHA Settings, provide the maximum failed login attempts after which CAPTCHA will be enabled. It can take values between 1 and 10.
- Click on Save.
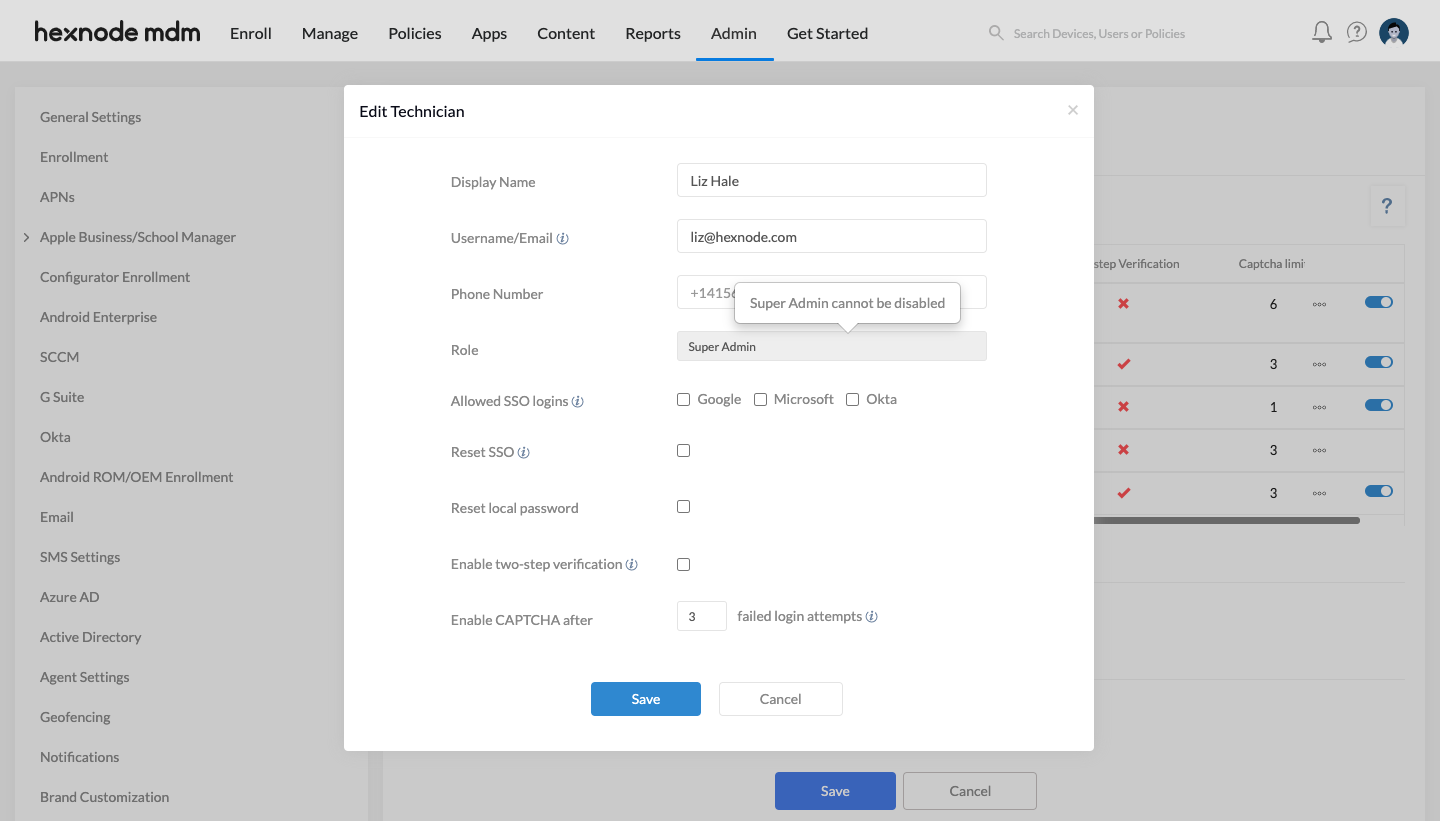
Edit Technician
For an admin or super admin to edit the details of a technician,
- Go to Admin > Technicians.
- Click on the more icon and select Edit Technician corresponding to the technician you want to edit.
- Click on Edit Information on the My profile page.
- You can change the first and last name, Username/Email, Phone number.
- Alter the Role of the other technicians if you want. But an Admin cannot change his own role. The role of the Super Admin cannot be changed.
- If the technician is editing his own details, he can add an image as his profile image. The supported file formats are jpeg, png, svg, bmp, and jps.
- You can edit the allowed SSO login option for the technician if required. If the login method previously set up for the technician is disabled, he will need to set up SSO login again or use the local credentials to log in. An email correspondence with an SSO reset link will be automatically sent to the technician, if this option is enabled.
- If a technician wants to reset his own local password, use the Change Password option. The technician will be asked to enter the old password, configure and verify the new password.
- You can also change the maximum failed login attempts before enabling CAPTCHA, if required.
- You can also edit the two-factor authentication (2FA) settings like
- Enabling/disabling two-factor authentication.
- Update the methods via which the verification code has to be sent.
- Enforce/relax setting up the third-party authenticator app.
- The frequency at which the technician will be forced to authenticate via a second factor for logging in.
- If you have already set up the authenticator app in an old or lost phone, you can reconfigure the app on a new device by clicking on Reconfigure Authenticator App. A new QR Code will be displayed on the screen via which the technician can set up the authentication app on a new device.
- If you want to change the time after which the technician logs out automatically, you can click on the dropdown beside the option Logout after and select the required time.
The available options are:- 30 min
- 45 min
- 60 min
- 90 min
- 2 hours
- 4 hours
- 8 hours
- Click Save.
Two Factor Authentication
The second authentication factor for technician login into Hexnode can either be a time-based email/SMS OTP or a verification code generated by a third-party authenticator app. Microsoft Authenticator or Google Authenticator can be employed as the third-party app that provides a verification code for safe login.
To enable 2FA for a technician, check Mandate Two Factor Authentication while creating the technician or check Enable Two Factor Authentication while editing the technician details.
To set up the authenticator app for 2FA, install the Google Authenticator or Microsoft Authenticator app on your device.
If the technician is setting up the portal for the first time,
- Navigate to your Hexnode portal and log in with the local/SSO account credentials.
- Open the authenticator app on your device and scan the QR code shown or enter the code displayed on the login page.
- Enter the verification code generated by the app on the portal for successful app set up.
If the authenticator app is already configured. But you want to reconfigure the app on another device,
- Log into your Hexnode portal.
- Click on your profile picture on the top right corner of the page.
- Click on My Profile > Edit Information.
- Click on Reconfigure Authenticator App. Open the app and scan the QR Code or enter the code displayed on the Hexnode MDM portal.
- Enter the verification code generated by the app on the portal and click Save.
Resend account activation link
For an admin or super admin to resend the account activation link of another technician,
- Go to Admin > Technicians.
- Click on the more icon and select Resend account activation link corresponding to the required user.
This will resend the activation link to the technician’s email account. This option will not be available once the technician sets up his Hexnode account.
Reset Password
If a super admin or admin wants to reset the password of another technician,
- Go to Admin > Technicians.
- Click on the more icon and select Reset Password corresponding to the technician whose password you want to reset.
- Click on Proceed.
A password reset link will be sent to the technician at the specified email ID. The email will expire in a day. The technician has to set up a new password using this link to sign in. The technician will be blocked from logging in to the portal until he sets up a new password using the password reset link.
Reset SSO
A super admin and an admin can reset his own or other technicians SSO accounts using this option.
- Go to Admin > Technicians.
- Click on the more icon and select Reset SSO corresponding to the required technician.
- A confirmation dialog box stating that an email will be sent to the technicians to reset the SSO account will be displayed. Click on Yes.
- Complete the user authentication to confirm the process.
Delete Technician
If an admin or a super admin want to delete a technician,
- Go to Admin > Technicians.
- Click on the more icon and select Delete Technician corresponding to the technician name.
- Click on Yes.
- Complete the user authentication and confirm the deletion process.
Deactivate Technician
A technician can be deactivated without removing his account from the portal. An Admin can deactivate the account of other technicians except a Super Admin. To deactivate a technician:
- Go to Admin > Technicians and Roles.
- Among the list of technicians, disable the toggle button corresponding to the technician whose account is to be deactivated.
- Complete user authentication to confirm the deactivation process.
A deactivated technician account can be activated by re-enabling the toggle button and completing the user authentication.
Different Technician Roles in Hexnode UEM
Super Admin
Super Admin has complete access over the portal and is an all-time active technician. They can edit, create, or delete other technicians. They can edit their own details but can’t change their role. They can also deactivate other active technicians. A Super Admin cannot be deleted or disabled. However, if you want to change the Super Admin, the Super Admin should login to the portal and should replace his Username/Email address with that of the new Super Admin.
Admin
Admin can access all the tabs in the portal. He can deactivate, add, edit or create other technicians except Super Admin. Admin can also edit his own details but can’t change his role or delete himself.
Apps and Reports Manager
Apps and Reports manager can access both the Apps and Reports tabs as well as the dashboard. However, such technicians cannot access other tabs in Hexnode or control the features in there.
Reports Manager
Reports Manager can access only the Reports tab and the dashboard.
Limiting the number of technicians as per the pricing plan
The number of technician roles that can be configured depends on the pricing plan you have subscribed to.
For Express plan,
- Only one technician is available. The technician will be assigned with the role of Super Admin.
- More technicians can be added by purchasing additional technicians from the portal. The newly added technicians will be assigned with the role of Admin.
- The CAPTCHA limit for failed technician login is set to the default value 3.
- Includes two factor authentication for technician login.
For Pro plan,
- Two technicians are available by default.
- The primary technician is Super Admin, and the other technician is Admin. No other technician roles are available.
- More technicians can be purchased from the portal. They will be assigned with the role of Admin.
- The CAPTCHA limit for failed technician login is set to the default value 3.
- Includes two factor authentication for technician login.
For Enterprise plan,
- Three technicians are included in this pricing plan.
- The primary technician is Super Admin. Other technicians, including the additional technicians purchased from the portal, can be assigned with any of the roles, Admin, Reports Manager or, Apps and Reports Manager.
- The CAPTCHA limit for failed technician login can be customized.
- Includes two factor authentication for technician login.
For Ultimate plan,
- There are four technicians included by default.
- The primary technician is Super Admin. The other technicians, including the additional technicians purchased from the portal, can be assigned with any of the roles, Admin, Reports Manager or, Apps and Reports Manager.
- The CAPTCHA limit for failed technician logins can be customized.
- Includes two factor authentication for technician login.
- Technician SSO login using Google, Microsoft and Okta is also included.
For Ultra plan,
- Five technicians are available by default.
- The primary technician is Super Admin. The other technicians, including the additional technicians purchased from the portal, can be assigned with any of the roles, Admin, Reports Manager or Apps and Reports Manager.
- The CAPTCHA limit for failed technician logins can be customized.
- Includes two factor authentication for technician login.
- Technician SSO login using Google, Microsoft and Okta is also included.
When the number of active technicians reaches the maximum limit allocated to each plan, you have to either deactivate or delete any of the active technicians or upgrade your pricing plan to add new technicians. You can also purchase additional technicians, if and when required via the License tab in Admin. The cost for an additional technician is as follows:
- Annual subscription – $300/year per technician
- Monthly subscription – $30/month per technician