Category filter
How to enroll a device in Hexnode via Azure AD?
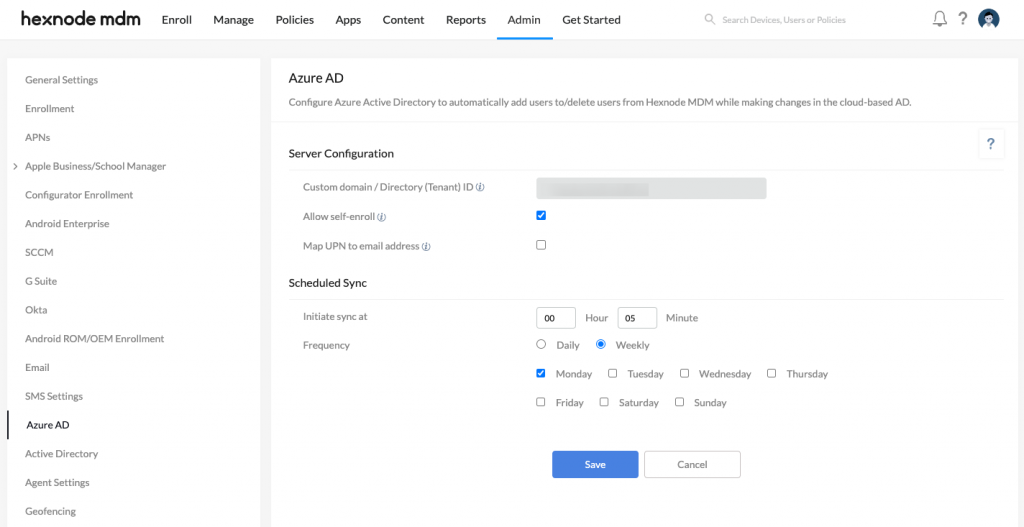
Azure Active Directory, better known as Azure AD, is a cloud-based identity and access management (IAM) solution. Hexnode’s integration with Azure AD helps in enhancing the user sync options and policy assignments. The integration also adds the ability to enroll to Hexnode via Azure AD. With the help of Azure AD, Hexnode offers its users identity-based access management solutions and meets the requirements of growing enterprises.
The integration between Hexnode and Azure AD also strengthens the overall security, with the help of features such as multi-factor authentication, single sign-on, etc. The IT admins can now have a secure and simplified device management system. To enroll devices with Azure AD, you must first configure Azure AD in Hexnode portal.
Enrolling Android Devices
In Hexnode MDM Portal
To enroll with Azure AD,
- Navigate to Enroll > Platform-Specific > Android > QR Code, Email or SMS.
- Choose Authenticated Enrollment.
- Select Azure AD User under Enrollment Request or Self Enrollment based on the mode in which you want to enroll your device.
- Choose the Ownership type and click Next.
- Specify how you want to send enrollment requests – via SMS, Email, or both.
- Select the Domain in which the user has to be enrolled.
- Now, select the User, and click Send.
What happens on the device?
- Download the Hexnode MDM app on the device.
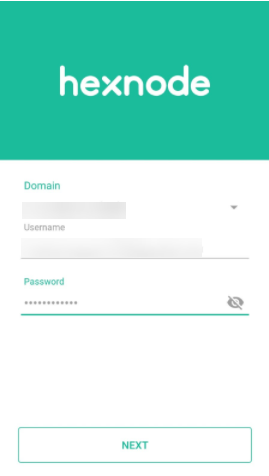
- Open the app and enter the server address. You can scan the QR code also. The server address will be of the form “portalname.hexnodemdm.com”.
- Now, a new page opens where the user is required to enter the username and password. Click Next.
- Follow the on-screen instructions to complete the enrollment procedure.
Enrolling iOS Devices
In Hexnode MDM Portal
To enroll with Azure AD,
- Navigate to Enroll > Platform-Specific > iOS > Email or SMS.
- Choose Authenticated Enrollment.
- Select Azure AD User under Enrollment Request or Self Enrollment based on the mode in which you want to enroll your device.
- Choose the Ownership type and click Next.
- Specify how you want to send enrollment requests – via SMS, Email, or both.
- Select the Domain in which the user has to be enrolled.
- Now, select the User, and click Send.
What happens on the device?
- Install the Hexnode MDM app on your device.
- Open the app and click on Agree & Continue.
- Provide the server address and click Next.
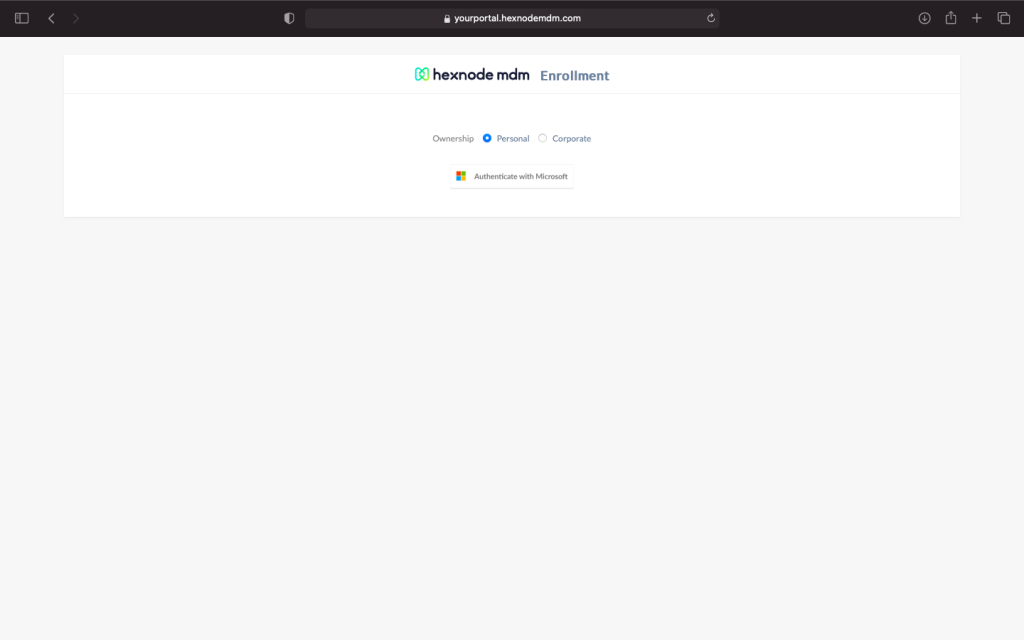
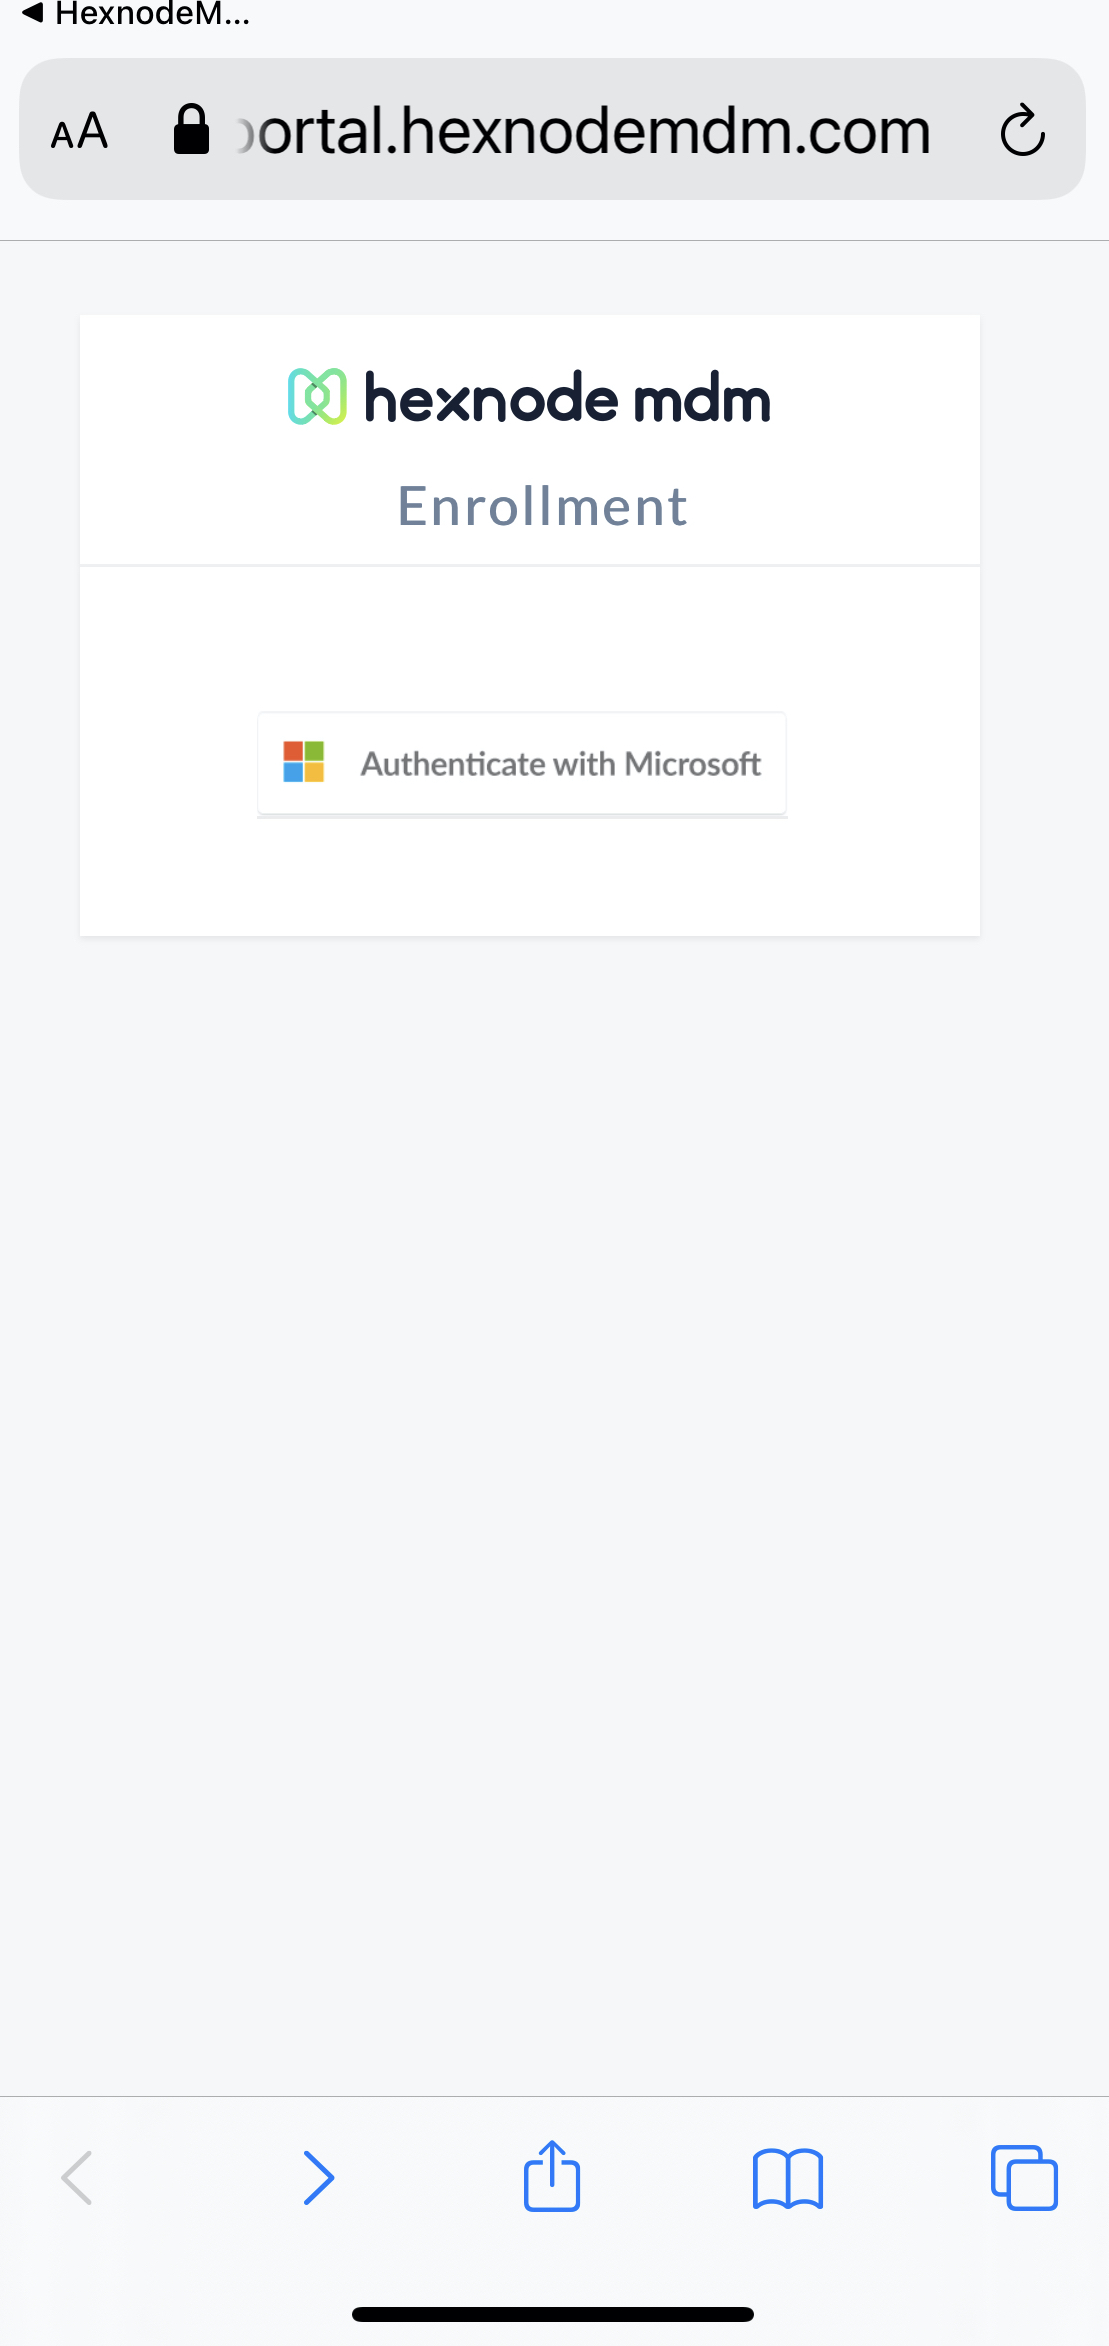
- This redirects you to your default browser where you can click on Authenticate with Microsoft.
- Upon authenticating, a pop-up is displayed with the message “This website is trying to download a configuration profile. Do you want to allow this?” From the options Ignore and Allow, choose Allow.
- Follow the on-screen instructions to enroll your devices in Hexnode.
Enrolling Windows Devices
In Hexnode MDM Portal
To enroll with Azure AD,
- Navigate to Enroll > Platform-Specific > Windows > Windows Phones or Windows PCs and Tablets.
- Choose Authenticated Enrollment.
- Select Azure AD User under Enrollment Request or Self Enrollment based on the mode in which you want to enroll your device.
- Choose the Ownership type and click Next.
- Specify how you want to send enrollment requests – via SMS, Email, or both.
- Select the Domain in which the user has to be enrolled.
- Now, select the User, and click Send.
What happens on the device?
- Open the web browser on the device.
- Enter the enrollment URL. It will be of the form
“portal-name.hexnodemdm.com/enroll”. - Click on the Download button and install the app.
- Give the required permissions and select Agree and Enroll.
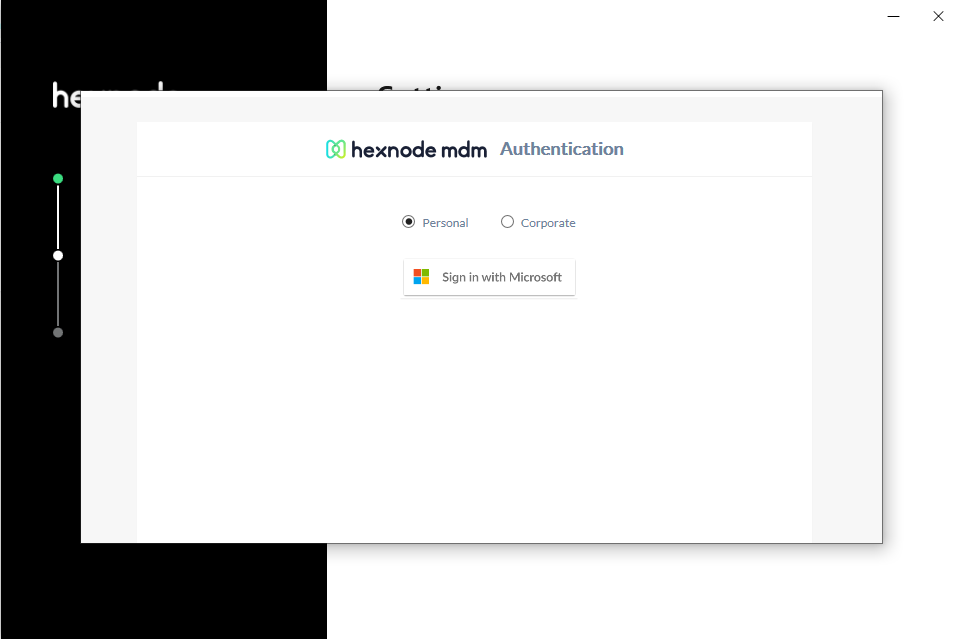
- Now, click on Sign in with Microsoft. Enter the username and password to continue with the enrollment procedure.
- Follow the on-screen instructions to enroll your devices in Hexnode.
Enrolling macOS Devices
In Hexnode MDM Portal
To enroll with Azure AD,
- Navigate to Enroll > Platform-Specific > macOS > Email or SMS.
- Choose Authenticated Enrollment.
- Select Azure AD User under Enrollment Request or Self Enrollment based on the mode in which you want to enroll your device.
- Choose the Ownership type and click Next.
- Specify how you want to send enrollment requests – via SMS, Email, or both.
- Select the Domain in which the user has to be enrolled.
- Now, select the User, and click Send.
What happens on the device?
- Open the Safari browser.
- Enter the enrollment URL. It will be of the form
“portal-name.hexnodemdm.com/enroll”. - Click Enroll.
- Now, click on Authenticate with Microsoft.
- Upon authenticating with your username and password, the profile will be downloaded on your macOS device.
- You can choose to install this by navigating to System Preferences > Profiles > Install. Upon doing so, the enrollment will be completed.