Organizations deal with a wide range of technical issues while administering Windows devices remotely. It includes device malfunctioning, app crashes, corrupted drivers, etc. Conventional troubleshooting methods require the administrators to perform onsite visits to diagnose the problems on the entire fleet of devices manually. However, such processes are tedious and time-consuming. Often, certain issues need an instant diagnosis. If such problems are not fixed at once, it might deter device performance.
The Remote View feature allows the administrator to remotely view and monitor the devices from the Hexnode MDM console. It enables rapid real-time diagnosis of Windows devices. This helps the administrator identify the problems and assist the users in resolving the issues.
Notes:
- This feature is supported on Enterprise, Ultimate and Ultra subscription plans.
- Remote View is supported on Windows 10 PCs.
- This feature requires the latest version of the Hexnode Remote Assist app and the Hexnode Agent app to be installed on the devices.
- Remote View is supported only on devices enrolled via the Hexnode installer as it requires the latest versions of the Hexnode Agent app and the Hexnode Remote Assist app to be installed on the device.
Configuring Remote View Settings in Hexnode Console
To start with remote view, initially you need to enable the Remote View settings from the Hexnode console.
Enabling Remote View Settings
- Login to your Hexnode portal.
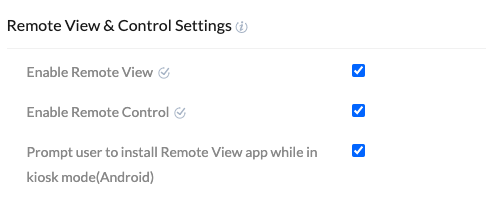
- Navigate to Admin > General Settings > Remote View & Control Settings.
- Check the option Enable Remote View. It adds the ‘Remote View’ section on the device summary page of the Hexnode MDM portal.
- Click Save.

Enabling Hexnode Update Helper Settings
- Login to your Hexnode portal.
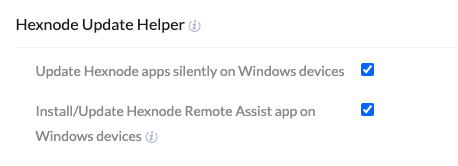
- Navigate to Admin > General Settings > Hexnode Update Helper.
- Check the option Install/Update Hexnode Remote Assist app on Windows devices. Enabling the option helps to install or update the Hexnode Remote Assist app on the devices automatically.
- Click on Save.

To start a remote view session on Windows devices
Follow the steps mentioned below to enable remote view on Windows devices.
- Login to your Hexnode portal.
- Navigate to Manage > Devices.
- Identify and select the device from the list of enrolled devices.
- On the Device Summary page, click on Start Session under ‘Remote View’.
Notes:
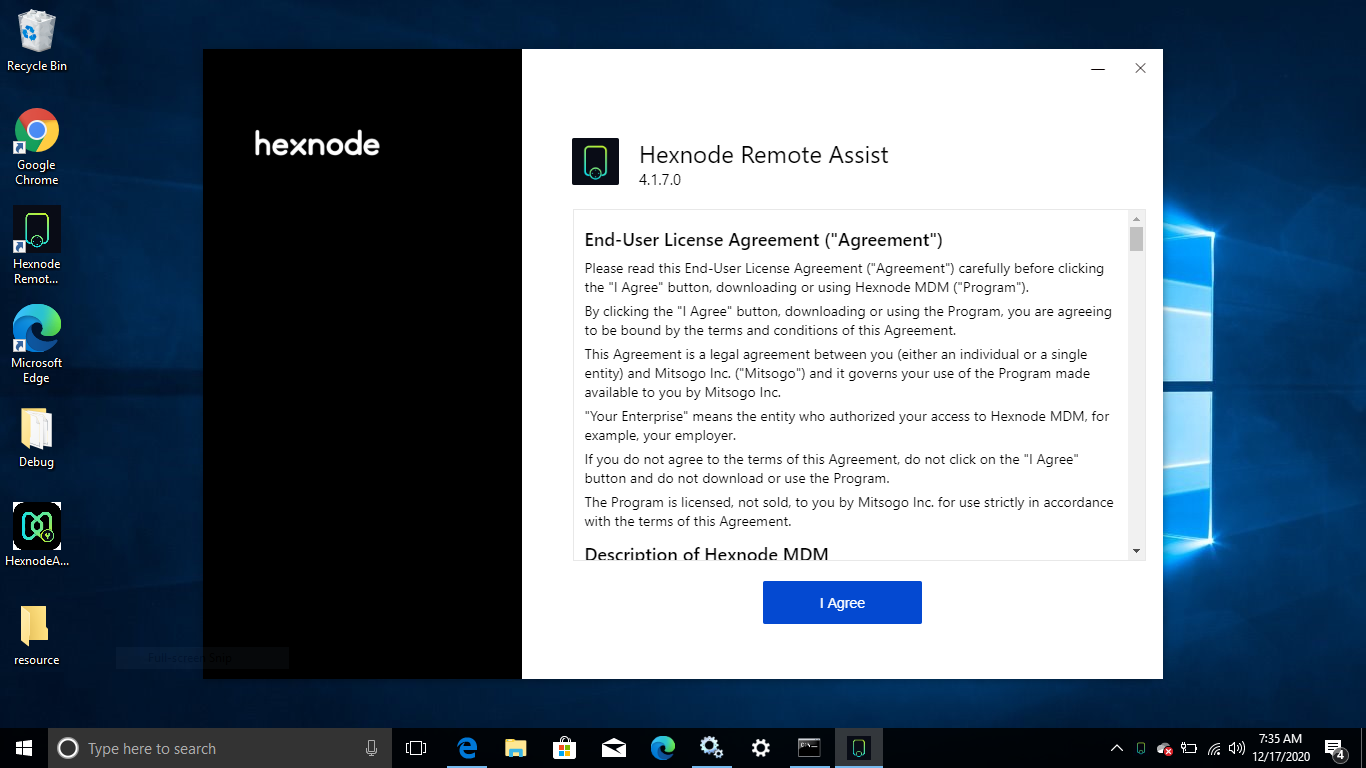
Hexnode Remote Assist app on the device enables remote view on Windows devices. This app generates the permission prompt for a remote session on the device when the administrator initiates the ‘Start Session’ action from the portal. The user is required to grant permission before the administrator can remotely view the device screen. The user also has to agree to the EULA terms and conditions for the Hexnode Remote Assist app when the administrator initiates a remote view session on the device for the first time or when the user opens the Hexnode Remote Assist app for the first time.

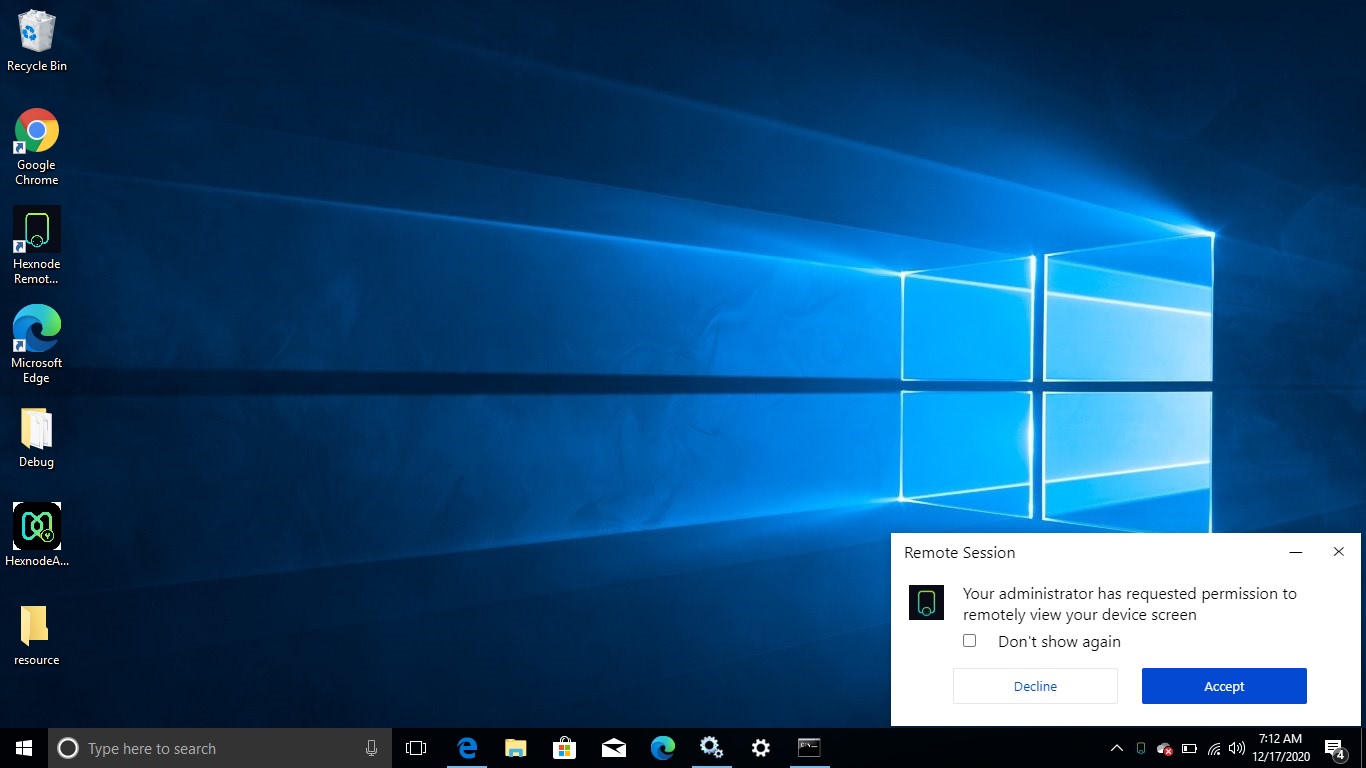
- The user is prompted to grant permission for the remote view session. If the user accepts the permission, the remote view session starts on the portal.
- Click on Stop/Restart button to end/resume the remote view session, respectively. Click on Maximize button to fit the remote view session to full screen.
Notes:
- While the administrator initiates the remote view session, the user can accept/decline the permission request from the device. Declining it prevents the administrator from remotely viewing the device screen from the Hexnode MDM console.
- If the user accepts/declines the permission leaving the ‘Don’t show again’ option unchecked, the user is permitting/denying a particular session only. On the contrary, if the ‘Don’t show again’ option is enabled, no more permission request is raised the next time. The response (accept/decline) initially given by the user when the request is raised will be considered the default permission the next time a remote view session is started.
- After granting permission for a given session, the user must also select the screen explicitly on the ‘Remote Assist app’. In case the device supports multiple screens (for instance, an extended screen using HDMI ports), the user should choose either of the screens. The administrator will be able to view the screen that the user selects.
- The user can switch between the screens using the ‘Remote Assist app’ on devices with extended screens. However, the selected screen gets forecasted on the Hexnode MDM portal only on the next remote view session.
- Despite which option the user chooses – Accept/Decline while the permission request is raised, permission can be revoked or changed from the Hexnode Remote Assist app on the device.


