Category filter
Azure Active Directory Integration with Hexnode UEM
Azure Active Directory (AD) is a cloud-based, multi-tenant identity and access management service. It provides easy sign-in provisions and automates workflow to meet the needs of your growing organization. It is a source to a single user or group information and provides a platform with enhanced security, access management, scalability and reliability for connecting multiple users.
Azure AD supports multi-factor authentication thus providing a source of security for organizational resources. It allows the users to sign in with their pre-existing credentials by bringing in single sign-on (SSO) based approach. Integrate your Azure AD with Hexnode and manage the Active Directory from a single console, sync your users and groups for easy enrollment and policy assignment.
Integrate Azure Active Directory
To configure Azure Active Directory with Hexnode,
- On your Hexnode MDM console, navigate to Enroll > All Enrollments and under Enterprise category, choose Azure AD.
- You’ll be directed to a screen to enter the Directory (Tenant) ID. Sign in to the Azure portal for your directory and copy the Directory ID (Azure Active Directory > Properties).
- Enter the Directory ID in the Directory (Tenant) ID field on the Hexnode console. Click Configure.
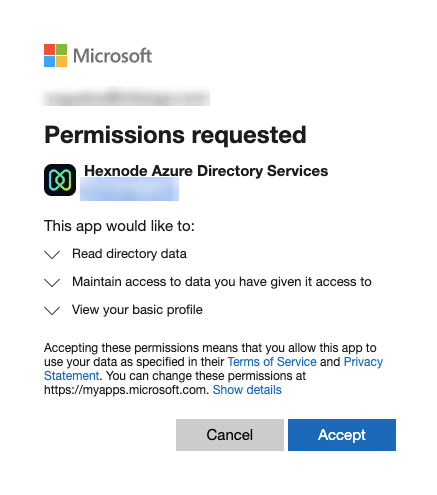
- You’ll be asked to sign in with your Azure portal user credentials. Click Accept. This will render the listed permissions to the Hexnode Azure Directory Services.
- Azure AD is configured. You can now sync the Active Directory with Hexnode UEM.
Schedule a sync
Hexnode UEM allows the users to decide how often they wish to sync the AD with Hexnode.
- Admins can choose to initiate sync either daily or on a weekly basis.
- Select the days of the week or choose a specific time of a day for the sync to occur.
Delete AD domain
Hexnode UEM lets users remove their Azure AD domain from the portal with ease.
- Access the Delete Domain option by clicking on the settings icon under Enroll > All Enrollments > Enterprise > Azure AD.
- During the deletion process, the administrator is provided with two options.
- Disenroll device(s)
- Assign to a new user
- Disenroll device(s) option removes the Azure AD domain from the portal and disenrolls all devices enrolled under the domain.
- Pre-approved devices will also be deleted from the portal.
- The admin is then required to specify the number of users that will be deleted under the domain and click on the Remove button to complete the process.
- Assign to a new user option lets the admin assign all devices under the domain to a new user. All existing restrictions/configurations and apps associated with the old user will be removed from the respective device(s).
- After specifying the number of users that will be deleted, click on the Remove button which will open a dialogue box to assign device(s) to a new user.
- Select the domain and choose the user to assign the devices.
- Toggle the Delete Old User’s Location History checkbox to delete location history of old users. Click on the Assign button to complete the process.


