Category filter
How to Set up Web Content Filtering for Mac?
Web content filtering enables your organization to regulate access to websites. Organizations may have to restrict access to certain websites due to compliance regulations, bandwidth usage, or other concerns. You can configure policies across your devices, effectively preventing users from accessing these URLs from the Safari browser.
Configure Web Content Filtering
- Go to Policies tab from the Hexnode MDM dashboard.
- Continue with an existing policy or create a new one by clicking on New Policy.
- Select Web Content Filtering from macOS > Security. Click Configure.
- Next, choose the Filter Type.
- Configure the necessary settings for web content filtering.
Filter Type 1: If you have chosen Blacklist as the filter type,
Blacklist Web URLs
Blacklisting a URL prevents the users from accessing any page on that website.
To blacklist web URLs, specify the URL to be blacklisted in the text field and click on Add.
.
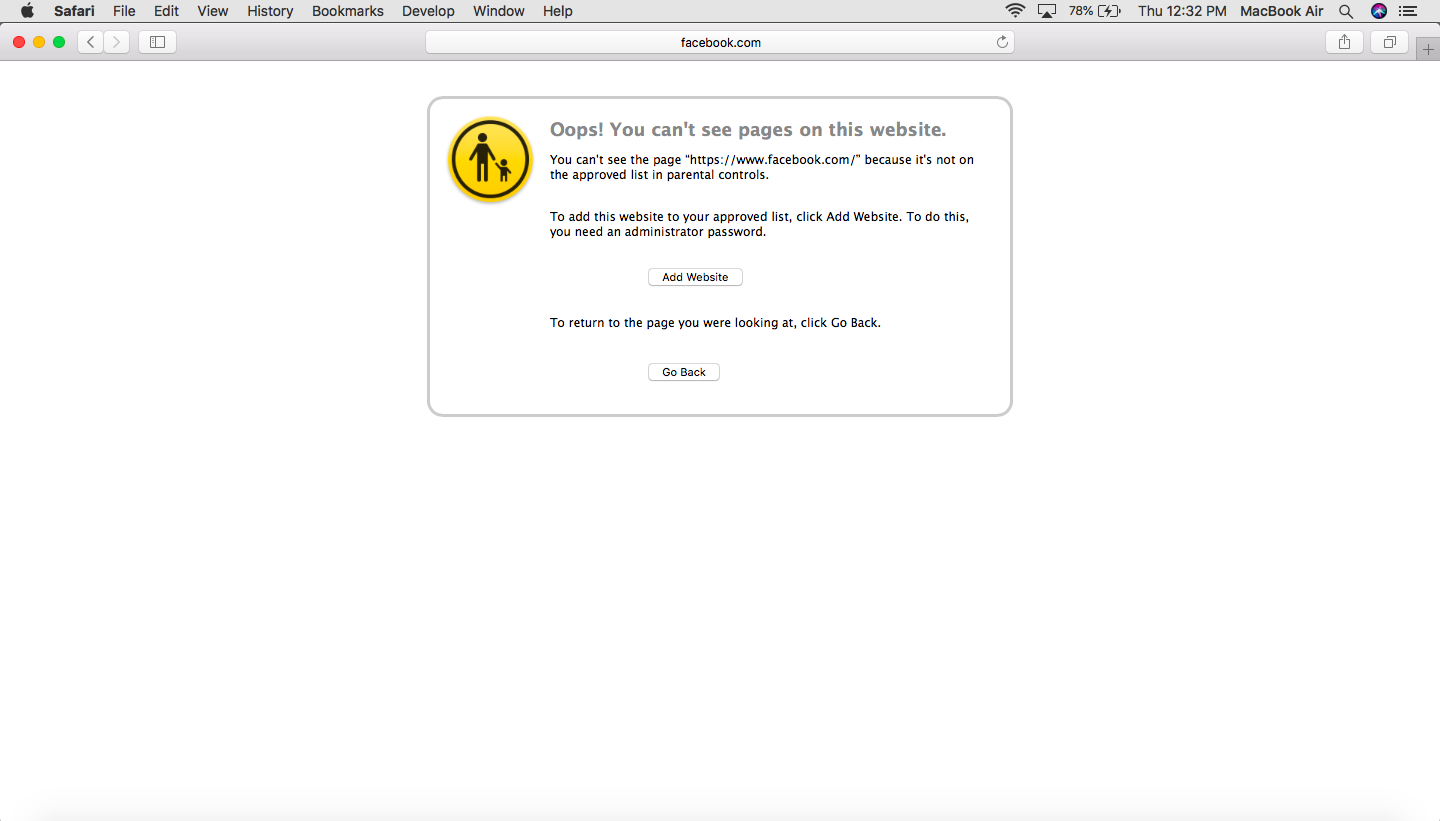
When a user tries to visit the blacklisted URLs, they will be locked out of the page with a warning message.

Blacklist by Content
The option Blacklist by Content is enabled by default for macOS devices and there is no provision to disable it. This option restricts the explicit content automatically. However, admin can allow the users to access those websites by whitelisting them.
This feature is useful when you may need to provide access to websites that are blocked based on content type. Since this is an automatically enabled restriction, you will have to provide access to these websites exclusively.
To whitelist an exceptional URL,
Enter the URLs in the text field and click Add.
When a user tries to visit sites with explicit content, they will be locked out of the page with a warning message.


Filter type 2: If you have chosen Whitelist as the filter type,
Whitelist Web URLs
Whitelisting blocks the users from accessing any of the websites except the whitelisted ones.
To whitelist web URLs,
Enter the URLs in the text field and click Add.
For URL Whitelisting, when the user tries to visit any other site, they are shown a warning along with the list of whitelisted sites.

Associate the policy with macOS devices
If you have not saved the policy yet,
- Go to Policy Targets > +Add Devices. Alternatively, you can choose to associate the policy to either device groups, users, user groups or domains from the left pane.
- Choose the target device/devices.
- Click Ok. Click Save.
If you need to add more devices, click on +Add Devices again and repeat the above steps. This won’t affect your previous selections.
If you are on a page that lists the policies,
- Select a policy.
- From Manage drop-down, choose Associate Targets.
- Choose the target devices and click Associate.
